Security Gateway
Overview
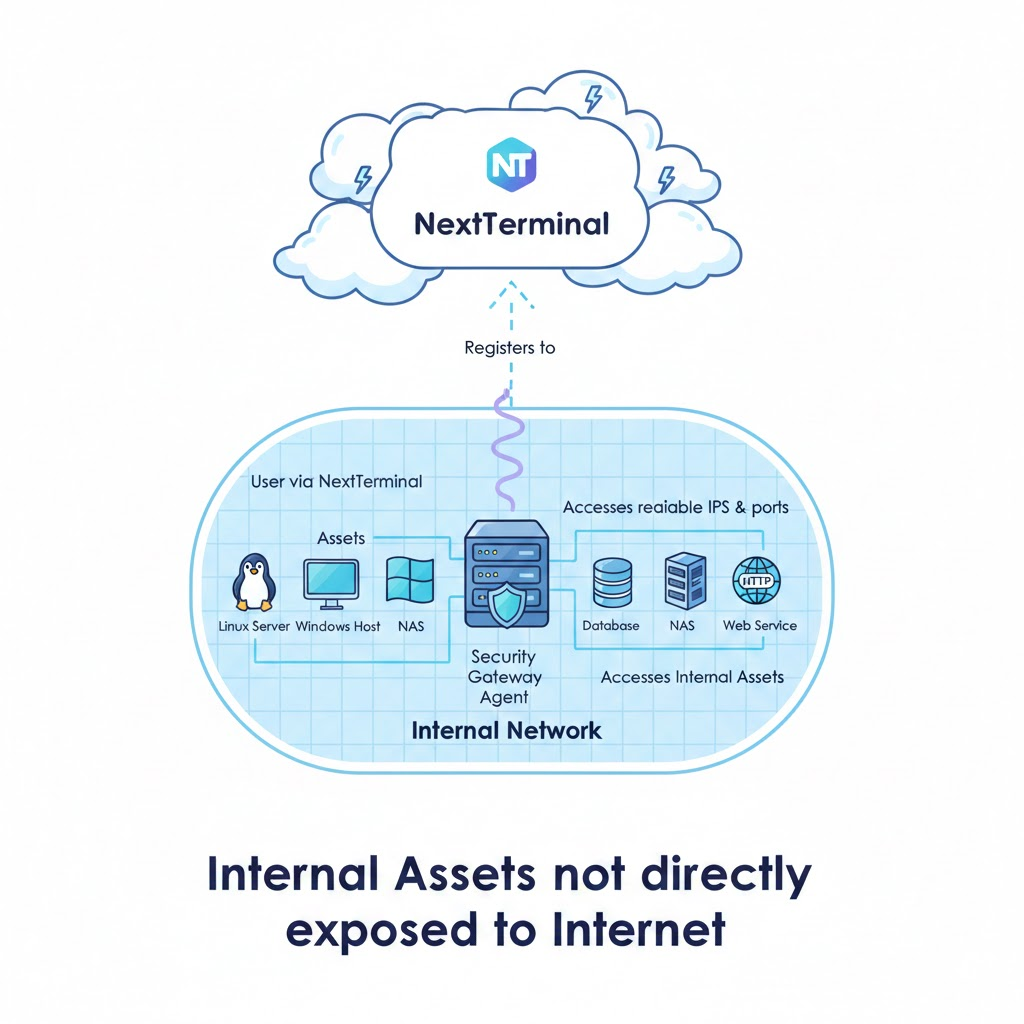
Security Gateway is an agent component of Next Terminal. It is deployed inside target networks and communicates with the server through WebSocket.
How it works
- Deploy Security Gateway in an internal network and register it to the server
- Select the corresponding gateway when creating assets on the server
- User traffic is forwarded through the selected gateway when accessing assets
- This enables access to IPs and ports inside that network environment
After installation, the gateway registers automatically. It must be able to reach the server Web endpoint. Encrypted communication depends on HTTPS configuration on the server side.
Main advantages
- Break network isolation and access internal assets
- Improve connection performance for high-latency assets
- Provide secure remote access tunnels
- No complex port mapping or VPN setup in target networks
Typical scenarios
- Access servers and devices in enterprise internal networks
- Manage geographically distributed network environments
- Access private assets inside cloud VPCs
- Access customer on-site internal devices
Registration Workflow
Copy registration command
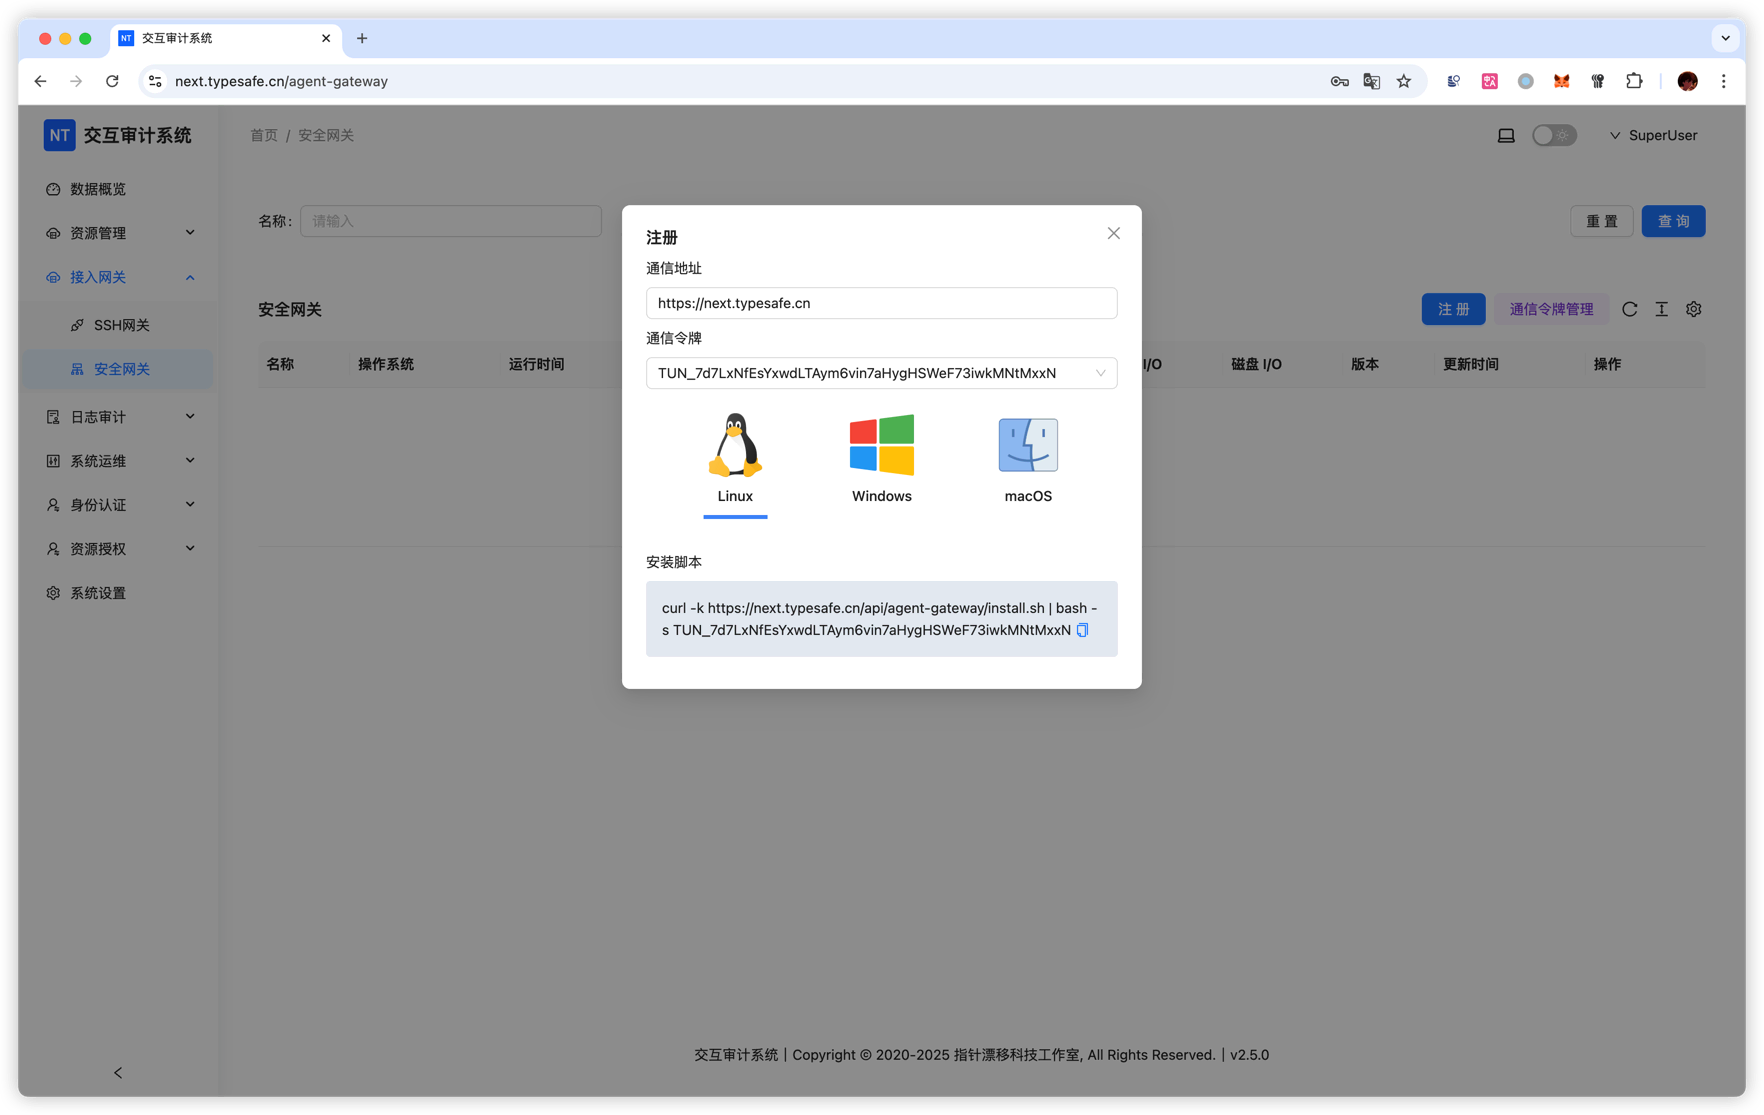
Run registration command
Paste the copied command into terminal and run it. The gateway will register automatically.
Show help
After installation:
nt-tunnel -hUsage Workflow
1. Verify gateway is online
In the Security Gateway management page, confirm the gateway is registered and online.
2. Add assets and bind gateway
When adding assets (SSH/RDP/VNC etc.):
- Fill asset IP reachable from the gateway network
- Select the gateway in the Security Gateway dropdown
- Fill other required connection info (port/account etc.)
3. Access assets through gateway
After asset creation, user connections are forwarded via the selected gateway automatically.
Example
Suppose you have an internal server 192.168.1.100:
- Install and register a gateway on one machine inside that network (for example named
Office-LAN-Gateway) - Add SSH asset on server:
- IP:
192.168.1.100 - Port:
22 - Security Gateway:
Office-LAN-Gateway
- IP:
- You can then access
192.168.1.100:22from external networks through this gateway
Service Management
Linux
Check status
systemctl status nt-tunnelCommon operations
- Start:
systemctl start nt-tunnel - Stop:
systemctl stop nt-tunnel - Logs:
tail -f /var/log/nt-tunnel.log
macOS
Check status
sudo launchctl list nt-tunnelA running service may look like:
{
	"StandardOutPath" = "/var/log/nt-tunnel.out.log";
	"LimitLoadToSessionType" = "System";
	"StandardErrorPath" = "/var/log/nt-tunnel.err.log";
	"Label" = "nt-tunnel";
	"OnDemand" = false;
	"LastExitStatus" = 0;
	"PID" = 63720;
	"Program" = "/Users/nobody/app/nt-tunnel";
	"ProgramArguments" = (
		"/Users/nobody/app/nt-tunnel";
		"run";
		"--endpoint";
		"https://next.typesafe.cn";
		"--token";
		"TUN_8qWs6xU6Vnhf8CewzFLtgVR3qSP8YKcoNPhPe5VThqbe";
	);
};
Common operations
- Start:
sudo launchctl start nt-tunnel - Stop:
sudo launchctl stop nt-tunnel - Logs:
tail -f /var/log/nt-tunnel.{out,err}.log